We make it easy to integrate your DLVRD account with your Shopify or WooCommerce store. You can now offer your customers the same discounted shipping rates from top-tier carriers like FedEx, Purolator and DHL. Shipments automatically appear in your DLVRD account and integration is simple. You even have access to our Shipping Specialists!
ECOMMERCE SHIPPING MADE EASY
As easy as 1-2-3…
Step 1
If you don’t already have a DLVRD account, create a free one today.
Step 2
Follow the corresponding link below to connect your store to your DLVRD account.
Step 3
Start shipping! Login to your DLVRD account to start processing orders, print shipping labels, and manage pickups. Access all your orders and invoices in one place.
Step 1
If you don’t already have a DLVRD account, create a free one today.
Follow the corresponding link below to connect your store to your DLVRD account.
Step 3
Start shipping! Login to your DLVRD account to start processing orders, print shipping labels, and manage pickups. Access all your orders and invoices in one place.
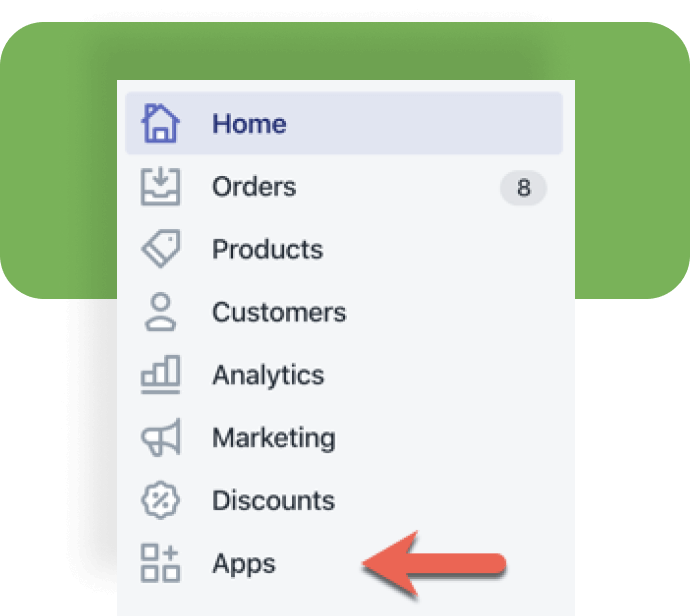
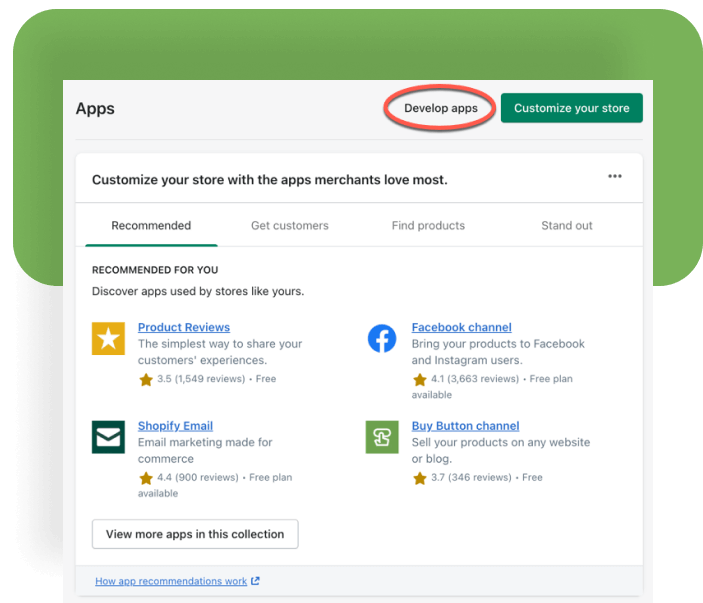
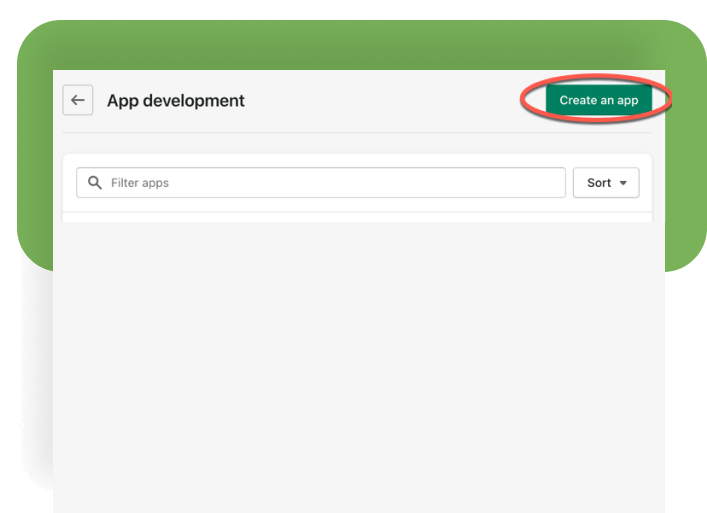
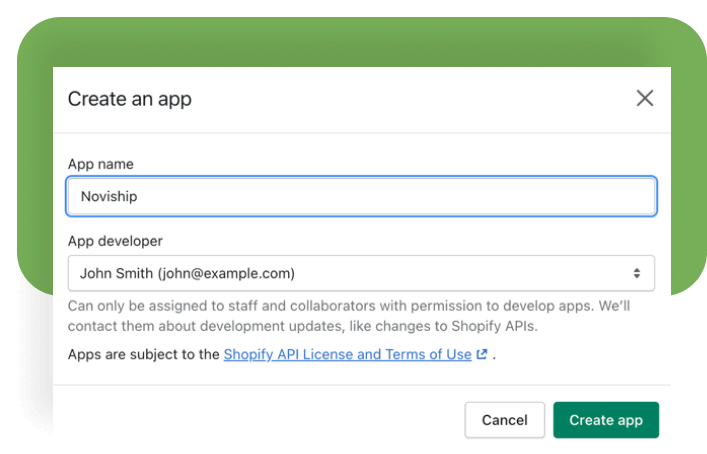
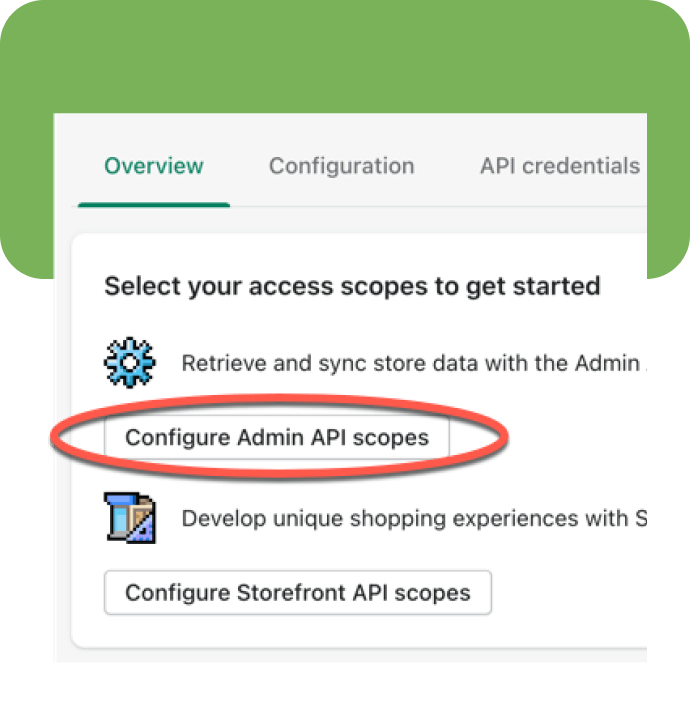
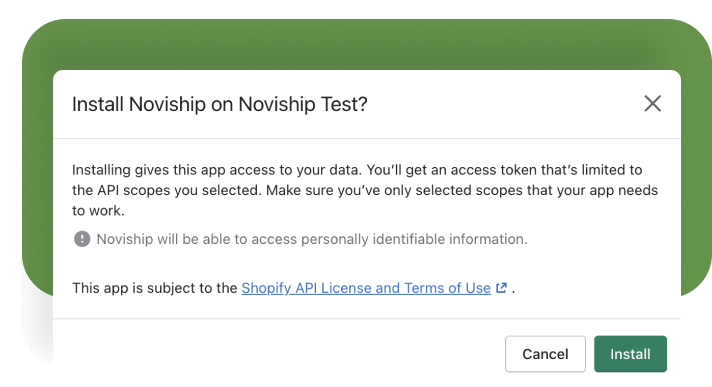
Integrate your DLVRD account today with Shopify and WooCommerce.
Our WooCommerce plugin can be installed on any WooCommerce WordPress site. It provides two basic functions: rating customer shipments and producing waybill.
Setting up the Plugin
This section will explain how the plugin is installed. At this time it is provided as a file that the site operator must manually upload in to their site.
Uploading the Plugin
The plugin is provided as a .zip file which you can e-mail to the site operator.
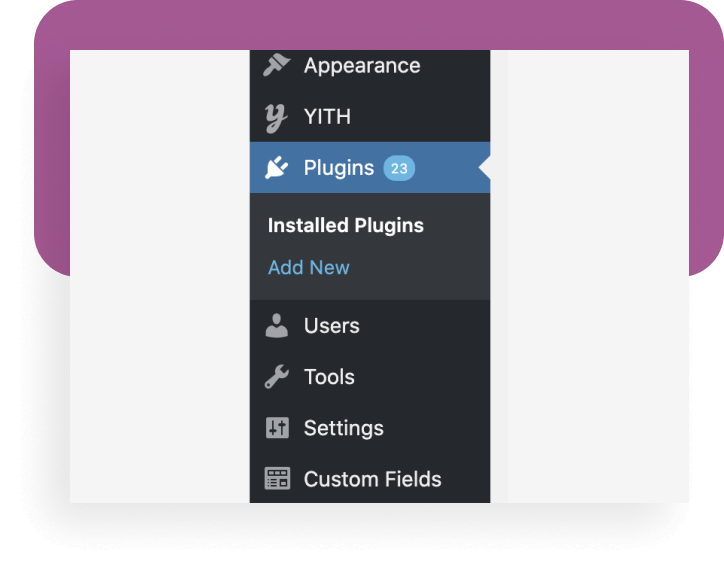
1- Go to the WordPress Administration site and find the Plugins section on the left menu. From here click on Add New.
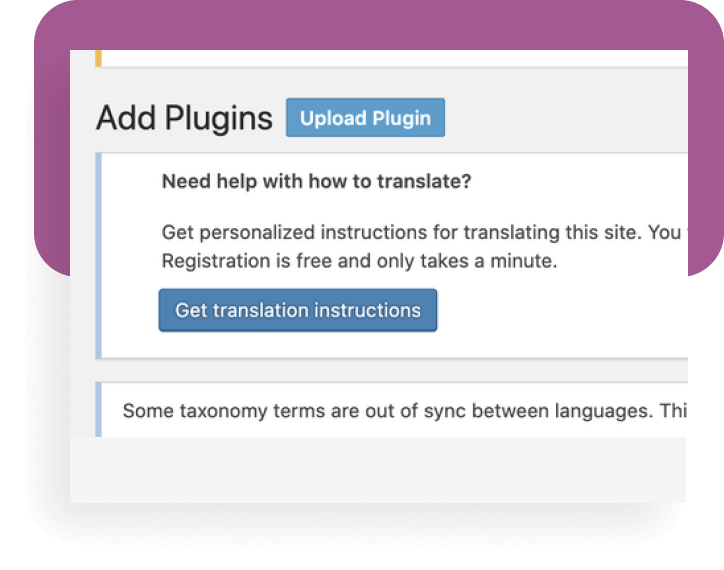
2- Click on the Upload Plugin button.
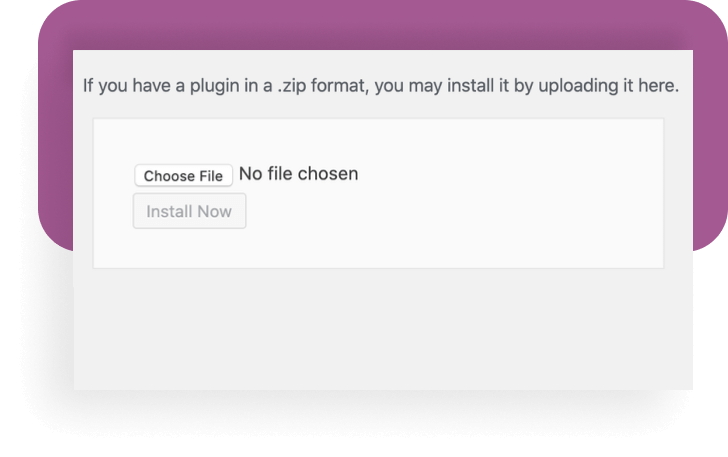
3- Find the upload section and click Choose File to select the plugin .zip. Then click Install Now.
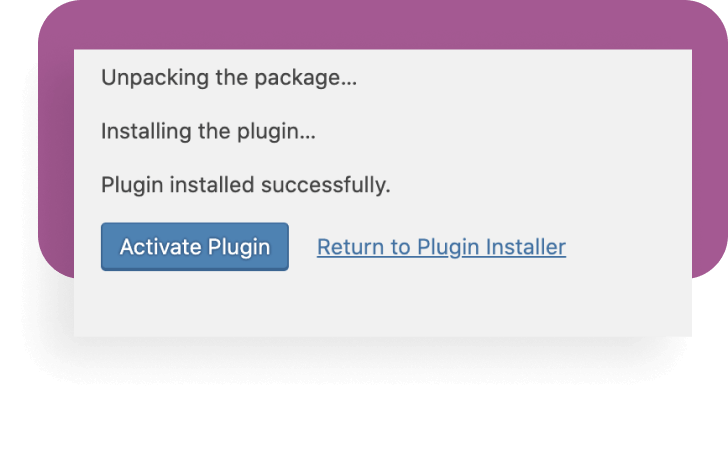
4- After clicking Install Now you should see the installation process complete with this message:
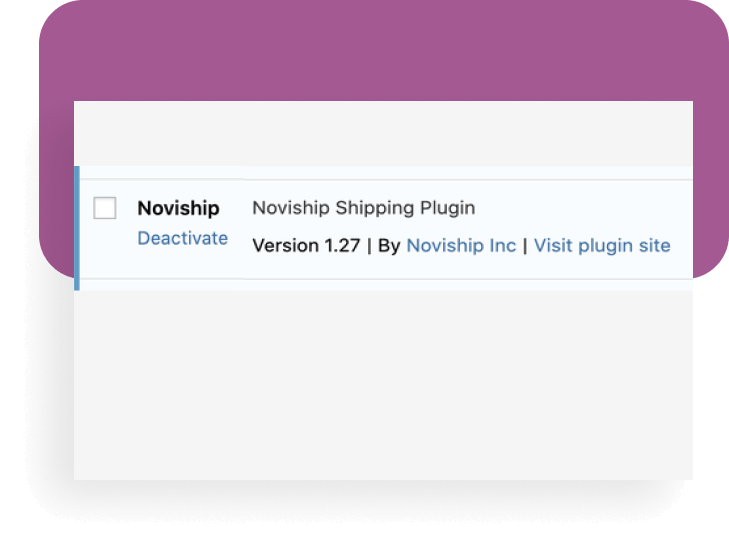
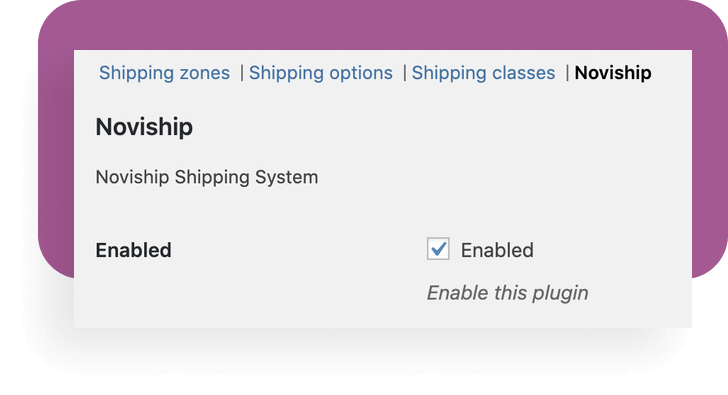
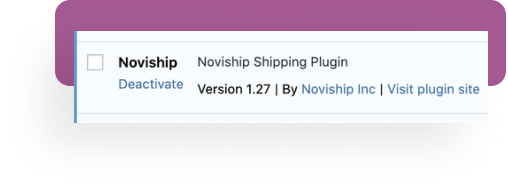
5- Now click Activate Plugin. Confirm the plugin is active by looking for it in the installed plugin list. Note that the plugin name may vary according to your branding agreement.
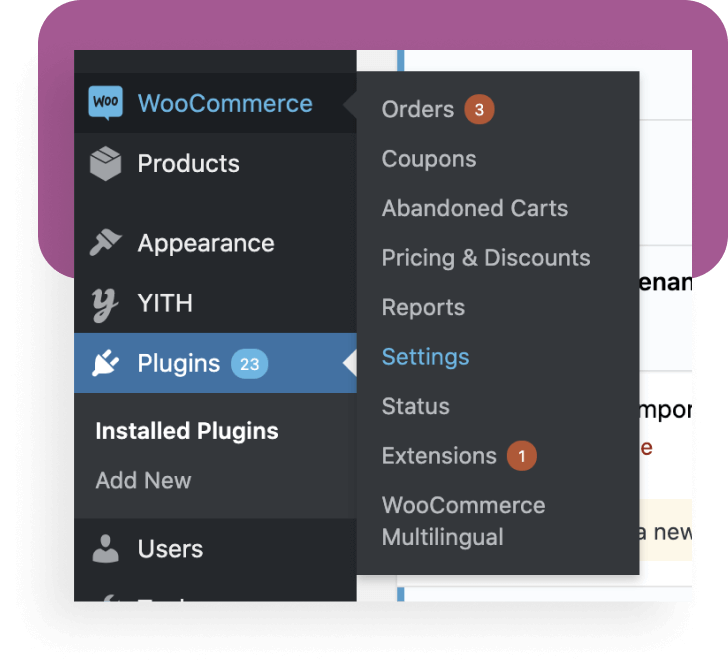
6- To configure the plugin, find the WooCommerce section on the left menu and go to Settings.
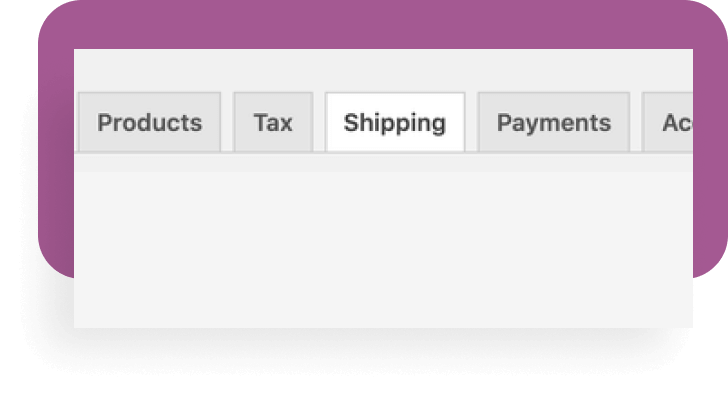
7- In the WooCommerce settings page click Shipping.
8- You will find a sub-menu with the shipping plugin listed. Click on it to open the configuration page. You can now configure your plugin.
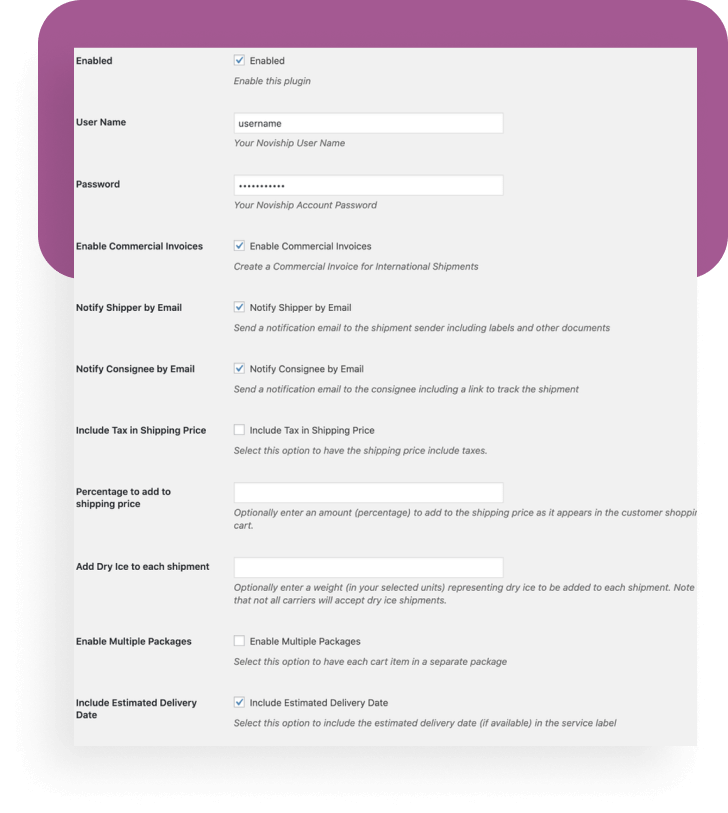
Plugin Configuration
The plugin configuration page has various settings. Please select your preferred settings.
If more than one choice is available, the customer must select which service they wish to use. When the shipping address is changed, WooCommerce sends a request to the system for pricing and this, in turn, consults the carriers. As a result, this process can take a little time – typically between 5 and 10 seconds.
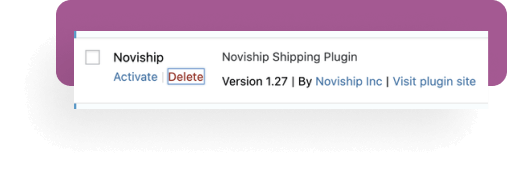
To update the plugin to a new version, the existing plugin must first be de-activated and removed. You can then install the new file by starting at the beginning of this tutorial.
Shipment Rating
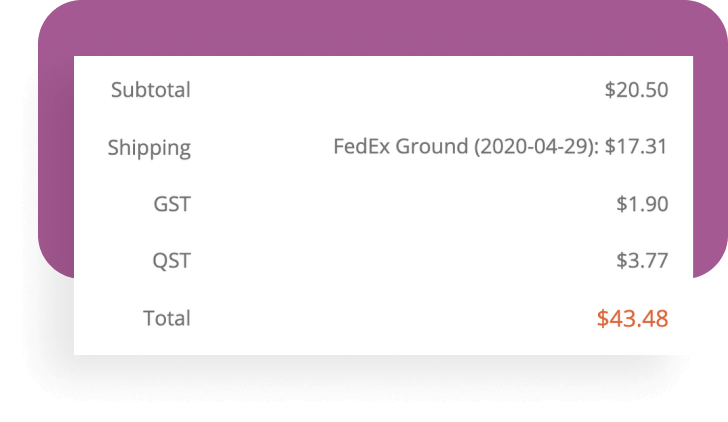
When the plugin is active, customers will see one or more shipping choices after they have entered their shipping address.
If more than one choice is available, the customer must select which service they wish to use. When the shipping address is changed, WooCommerce sends a request to the system for pricing and this in turn consults the carriers. As a result this process can take a little time – typically between 5 and 10 seconds.
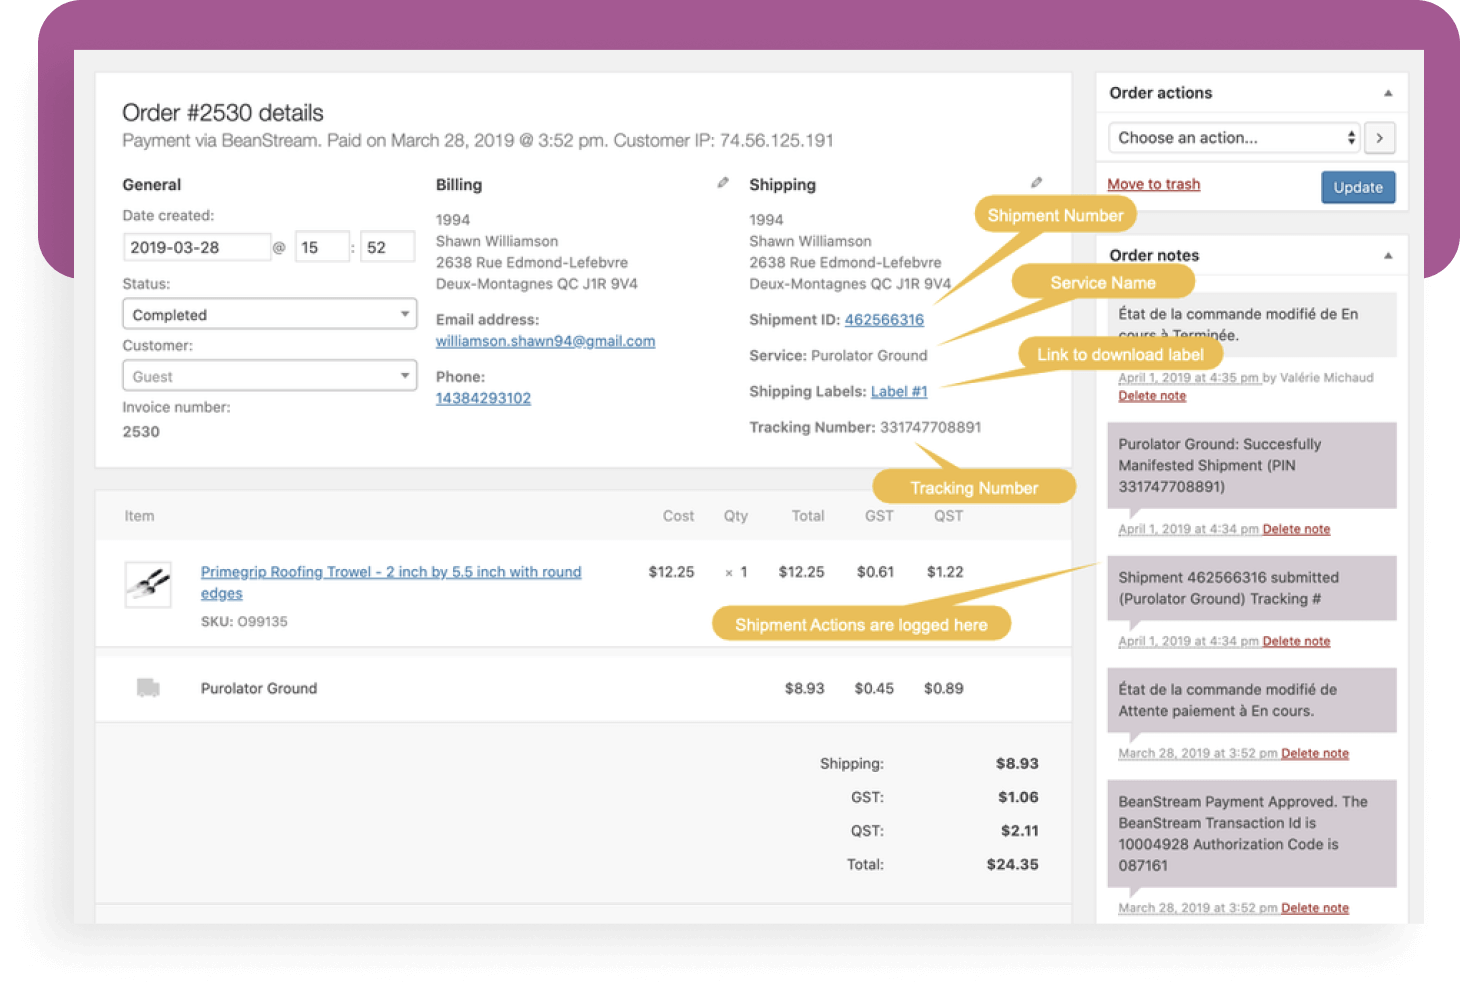
Managing Orders
When an order is received it will appear in the WooCommerce orders page. Viewing an order will result in a page similar to the one below.
Creating a Shipping Label
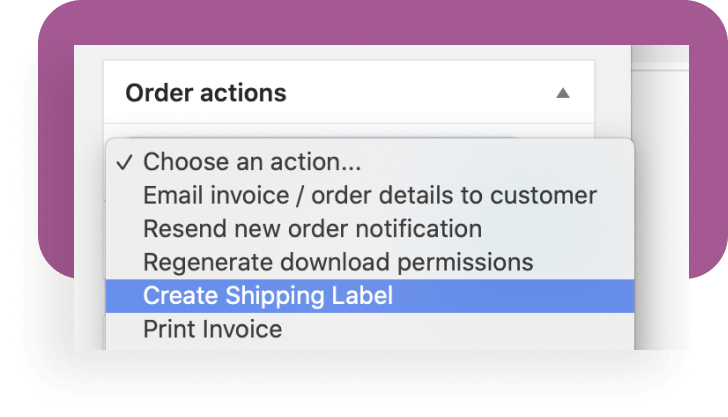
To print a label, in the Order actions section click the Choose an action dropdown and select Create Shipping Label.
This will result in the shipment data being submitted to Noviship and a label will be requested. This is only possible if the shipment was rated for the customer and they chose a shipping method.
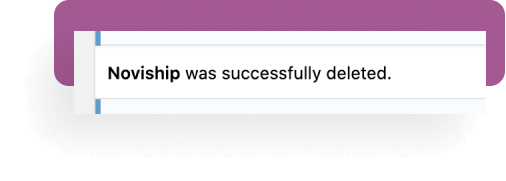
Updating the Plugin
To update the plugin to a new version, the existing plugin must first be de-activated and removed.
And you can then install the new file by starting at the beginning of this tutorial.